- 한국어
- English
- 日本語
- 中文
- العربية
- Español
- Français
- Deutsch
- Pусский
- Tiếng Việt
- Indonesian
Steps to making traditional Korean pottery
Usually, the kiln will be fired for two to three days, or about 45 hours. For the first 15 hours, the fire slowly heats up the kiln and dries any moisture that's inside. The temperature is then increased to about 1,200 degrees Celsius, the melting point of the glaze, and continues thus for about 30 additional hours.
The pine logs, changsol, are used to fuel the fire.
(Left) Dissolve the clay in water in order to remove any foreign objects; (right) Mix the clay in water to remove any contaminants.
Treatment of the Clay
The most important element in the production of pottery or earthenware is the clay itself. This is called jeomto or jil in Korean. High-quality clay has a brownish tint because of the high iron content and is also very sticky. The first step in making pottery is to treat the clay.
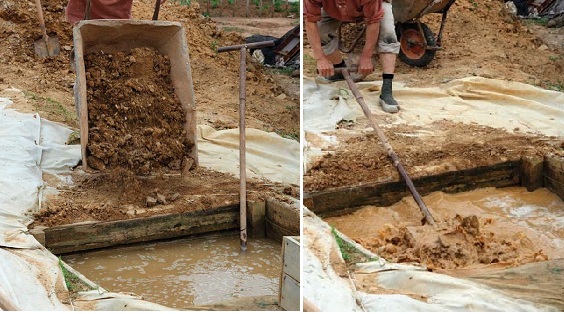
Drench the newly dug up clay and allow it to get wet evenly.
Second, rinse the clay in water to remove any foreign substances. A strainer is used to remove any stones, sand, tree roots or grass. Let it dry until it is ready to knead. In Korean, this process is called subi.
After treating the clay, mix it and form it into bricks. If the condition of the clay is fine, with few contaminants, you can skip the previous step.
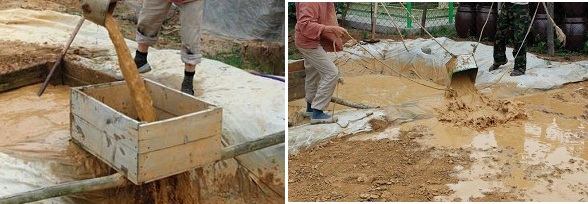
(Left) Sift out any contaminants with a strainer; (right) Remove and dry the filtered clay-water slurry.
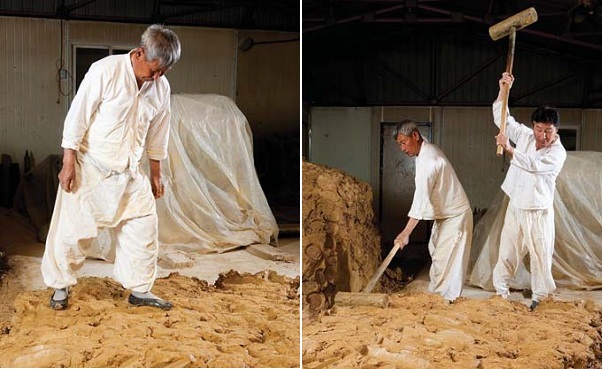
(Left) As the clay dries, begin to form it into bricks; (right) Hammer and beat the clay into shape.
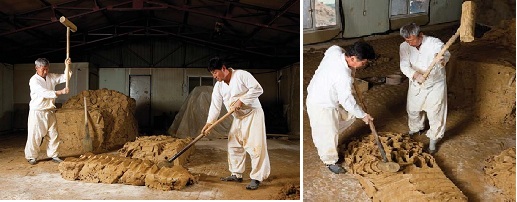
(Left) After kneading, cut the clay into hand-held sized pieces; (middle) Pile the broken clay in place; (right) Pound the clay with a mallet to soften the clay.
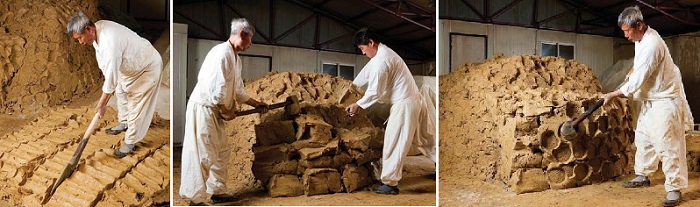
Step three involves the removing of any contaminants with a so-called mud knife, peeling the clay into 20 or 30 millimeter strips to catch any foreign objects that weren't caught in the strainer. This process is called ggaeggijil in Korean. It will make the clay softer because it takes the air out of the clay. The density of the clay is also increased. After this, form the clay into round chunks about 40 centimeters in diameter. These roundish bricks are called jilmoongchi.
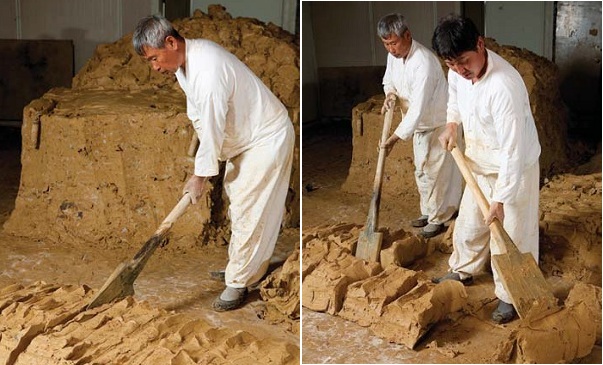
(Left) Cover the clay bricks with clean dirt to prevent them from sticking; (middle) Again, remove any contaminants by slicing the clay bricks with a so-called mud knife; (right) Lump the clay into large, round clods.

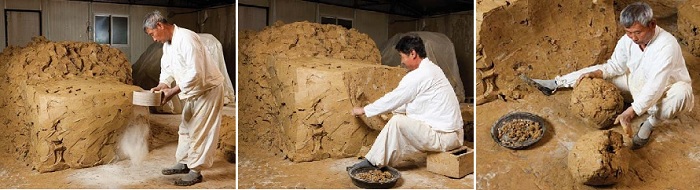
(Left) Spread clean dirt on the clods to prevent them from sticking; (right) Dampen and flatten the clods.
(Left) Mix the clay with the mallets; (right) During this process, the clay gets softer and more dense.
In step four, mix the chucks of clay together using the mallets. Traditionally, clean dirt is spread on the ground as the bricks are lined up, in order to prevent them from sticking. Today, however, a piece of hemp or cotton is sometimes used in place of the clean dirt. The mallets for kneading are varied in size, according to use, and pounding or kneading the clay should be done with consistency.
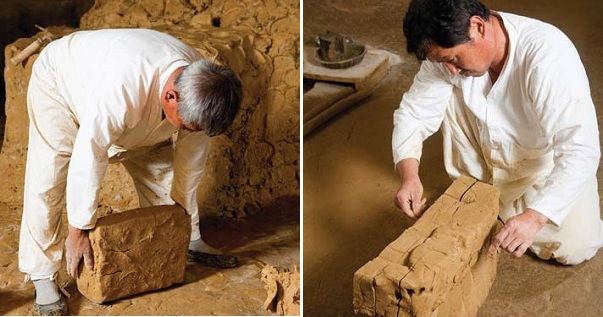
(Left) After kneading, cut the clay into manageable bricks; (right) Turn the clay and lift it from the bottom.
(Left) Pound the clay to make it square; (right) Form the clay into a strip.
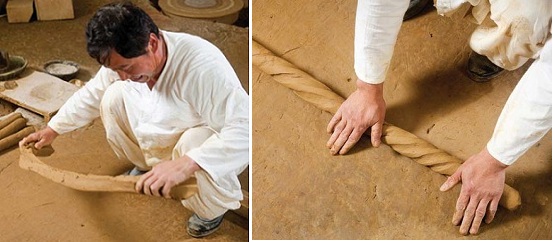
(Left) Strips of clay are used to form the final pottery urns; (right) Roll the strips of clay to form strips.
After kneading, cut the clay into manageable bricks and stack them to the side. Cover the stacked bricks with a damp cloth to prevent them from drying out.
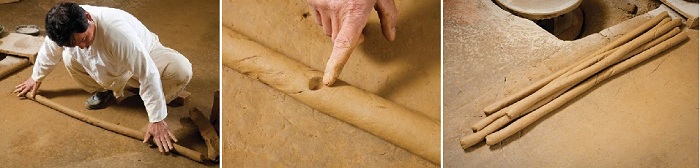
(Left) Form the clay into long rolls; (middle) The clay is formed into long rolls so as to better form the final pottery works; (right) Form the clay into long, thin rolls, to be used in the final pottery process.
Step six is the last step before shaping. Form the clay into round rolls, about 120 centimeters long and four centimeters thick. These are the final clay pieces that will be used to form the pottery.
*This series of article has been made possible through the cooperation of the National Research Institute of Cultural Heritage. (Source: Intangible Cultural Heritage of Korea)